Setting up Web SSH on Raspberry Pi free is a powerful way to access your Raspberry Pi remotely from any device with an internet connection. Whether you're a beginner or an advanced user, this guide will walk you through the process step-by-step. Learn how to configure Web SSH securely and efficiently.
As technology continues to evolve, the need for remote access to devices becomes increasingly important. The Raspberry Pi, with its versatility and affordability, has become a favorite among hobbyists and professionals alike. One of the most effective ways to manage your Raspberry Pi remotely is by setting up Web SSH.
Web SSH allows you to access your Raspberry Pi from any web browser without needing additional software. This article will provide detailed instructions, tips, and best practices to set up Web SSH on Raspberry Pi for free, ensuring a seamless experience for users of all levels.
Read also:Alex Lagina Uncovering The Mysteries Of Oak Island
Table of Contents
- Introduction to Web SSH on Raspberry Pi
- Benefits of Using Web SSH
- Prerequisites for Setting Up Web SSH
- Installing Web SSH on Raspberry Pi
- Configuring Web SSH
- Securing Your Web SSH Setup
- Troubleshooting Common Issues
- Alternatives to Web SSH
- Best Practices for Web SSH
- Conclusion and Next Steps
Introduction to Web SSH on Raspberry Pi
Web SSH on Raspberry Pi is a method that enables you to remotely access your Raspberry Pi using a web browser. Unlike traditional SSH, which requires a terminal application, Web SSH allows you to connect directly through a browser interface. This makes it incredibly convenient for users who want to manage their Raspberry Pi from anywhere in the world.
Why Choose Web SSH?
There are several reasons why Web SSH is becoming a popular choice for Raspberry Pi users:
- Platform-independent: Accessible from any device with a web browser.
- Easy setup: No need for complex configurations or additional software.
- Secure connection: Encrypted communication ensures data privacy.
Who Can Benefit from Web SSH?
Whether you're a home user managing a media server or a professional running a fleet of Raspberry Pi devices, Web SSH offers flexibility and convenience. It is particularly useful for those who frequently travel or need remote access to their Raspberry Pi.
Benefits of Using Web SSH
Using Web SSH on Raspberry Pi provides numerous advantages that traditional SSH methods may not offer. Below are some of the key benefits:
- Convenience: Access your Raspberry Pi from any device with a web browser, eliminating the need for specialized software.
- Flexibility: Ideal for users who need to manage multiple Raspberry Pi devices remotely.
- Security: Web SSH uses encryption to protect your data during transmission.
- Cost-effective: Setting up Web SSH on Raspberry Pi is free, making it an affordable solution for remote access.
These benefits make Web SSH an attractive option for both personal and professional use cases.
Prerequisites for Setting Up Web SSH
Before you begin setting up Web SSH on your Raspberry Pi, ensure that you have the following prerequisites in place:
Read also:Discovering Sheila Grundys Age A Comprehensive Guide To Her Life And Achievements
- A Raspberry Pi device with Raspbian or any compatible operating system installed.
- An active internet connection on your Raspberry Pi.
- A web browser on the device you plan to use for remote access.
- Basic knowledge of command-line operations.
Having these prerequisites ready will streamline the setup process and ensure a smooth experience.
Installing Web SSH on Raspberry Pi
Installing Web SSH on your Raspberry Pi is a straightforward process. Follow the steps below to get started:
Step 1: Update Your Raspberry Pi
Begin by updating your Raspberry Pi to ensure you have the latest software versions. Open the terminal and run the following commands:
sudo apt update
sudo apt upgrade
Step 2: Install Web SSH Software
There are several Web SSH solutions available, such as webssh and ttyd. For this guide, we'll use webssh. Run the following command to install it:
sudo pip3 install webssh
Step 3: Verify Installation
Once the installation is complete, verify that Web SSH is installed correctly by running:
webssh --version
This will display the installed version of Web SSH, confirming a successful installation.
Configuring Web SSH
After installing Web SSH, the next step is to configure it for optimal performance. Follow these steps:
Step 1: Start the Web SSH Service
To start the Web SSH service, use the following command:
webssh --bind=0.0.0.0 --port=8080
This will bind the service to all network interfaces and make it accessible on port 8080.
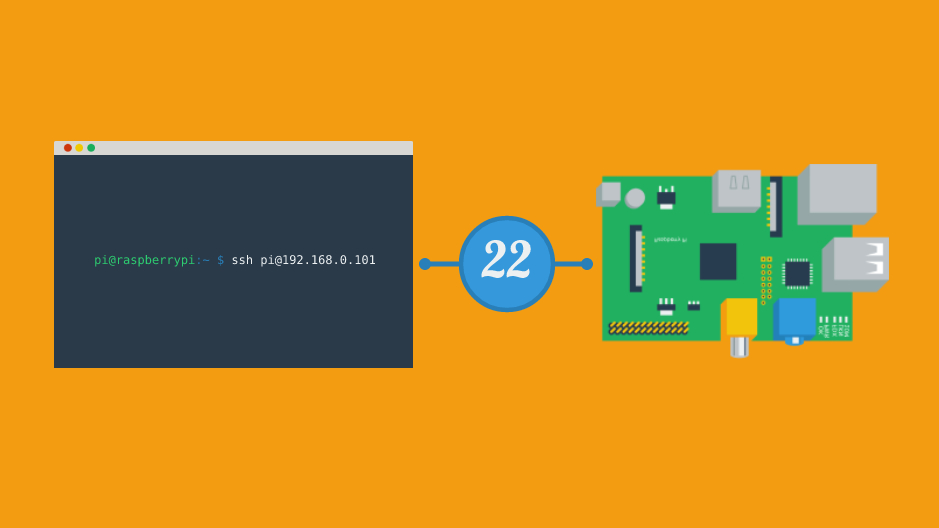
Step 2: Access Web SSH
Open your web browser and navigate to http://[your-pi-ip]:8080. Replace [your-pi-ip] with the actual IP address of your Raspberry Pi.
You should now see the Web SSH interface, where you can enter your SSH credentials to connect.
Securing Your Web SSH Setup
Security is a critical aspect of any remote access solution. Follow these best practices to secure your Web SSH setup:
- Use Strong Passwords: Ensure that your SSH credentials are strong and not easily guessable.
- Enable Two-Factor Authentication (2FA): Add an extra layer of security by enabling 2FA for SSH access.
- Restrict Access: Use firewall rules to limit access to your Raspberry Pi's Web SSH service to trusted IP addresses.
- Regular Updates: Keep your Raspberry Pi and Web SSH software up to date to protect against vulnerabilities.
Implementing these security measures will help safeguard your Raspberry Pi from unauthorized access.
Troubleshooting Common Issues
Even with careful setup, issues can arise. Below are some common problems and their solutions:
Issue 1: Unable to Connect to Web SSH
Solution: Ensure that your Raspberry Pi is connected to the internet and that the Web SSH service is running. Check the IP address and port number you are using to access the service.
Issue 2: Slow Connection
Solution: Optimize your network settings and consider using a wired connection instead of Wi-Fi for better performance.
Issue 3: Security Alerts
Solution: Review your security configurations and ensure that all necessary precautions are in place.
Alternatives to Web SSH
While Web SSH is a powerful tool, there are alternative methods for remote access to your Raspberry Pi. Some popular options include:
- SSH Clients: Traditional SSH clients like PuTTY or Terminal.
- VNC: Virtual Network Computing for graphical remote access.
- NoMachine: A high-performance remote desktop solution.
Each alternative has its own advantages and disadvantages, so choose the one that best suits your needs.
Best Practices for Web SSH
To maximize the effectiveness of Web SSH on your Raspberry Pi, follow these best practices:
- Regular Backups: Always back up your data regularly to prevent loss in case of system failure.
- Monitor Logs: Keep an eye on system logs to detect and address any issues promptly.
- Stay Updated: Regularly update your Raspberry Pi and Web SSH software to benefit from the latest features and security patches.
Adhering to these practices will ensure a reliable and secure Web SSH setup.
Conclusion and Next Steps
Setting up Web SSH on Raspberry Pi free is a straightforward process that offers numerous benefits for remote access. By following the steps outlined in this guide, you can configure a secure and efficient Web SSH setup tailored to your needs.
We encourage you to share your experience and any tips you may have in the comments section below. Additionally, explore other articles on our site to enhance your Raspberry Pi skills further. Together, let's build a smarter, more connected future!